


Step 1: Create your form and set up the email action
In Elementor, build your form and add an ‘Email’ action under the form’s Actions After Submit settings. In version 3 forms, you can add ‘Email 2’ if you want to set up two email actions. For example, you may want one email to go to yourself, and one to go to the form submitter as a confirmation (currently two emails are only possible in V3).
Step 2: Configure your email settings and message
With the Email action(s) added, click on it to expand the settings. Fill in the key fields as you would normally — To, Subject, From Email, From Name, Reply To etc. The message field is the important one for us. By default this contains [all-fields], which outputs every form field and its value. You can just leave this as is, the code snippet we’re adding later will still work and remove the empty fields automatically. If that’s all you need, skip to Step 3.
If you’d like to add custom content around your fields, such as a greeting or sign-off, wrap the shortcode in the following markers so the snippet knows which part to filter:
<!--fields_start-->[all-fields]<!--fields_end-->The markers aren’t always necessary, but adding them is the safer option — they tell the PHP exactly where to look for empty fields, so there’s no risk of your custom content being affected.
Below are examples of how your message field may look in a V3 form and a V4 Atomic form. Notice the only difference is how individual fields are referenced. V4 has simplified the shortcode syntax — no longer needing the attribute name, just the value, e.g. [field id=“first_name“] in V3 becomes simply [first_name] in V4.
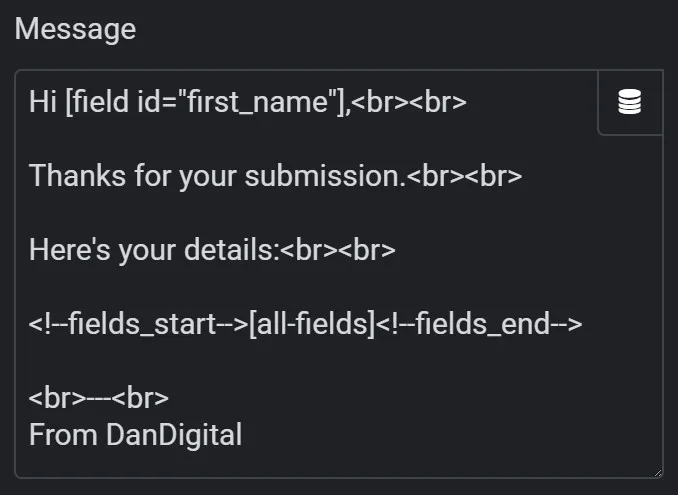
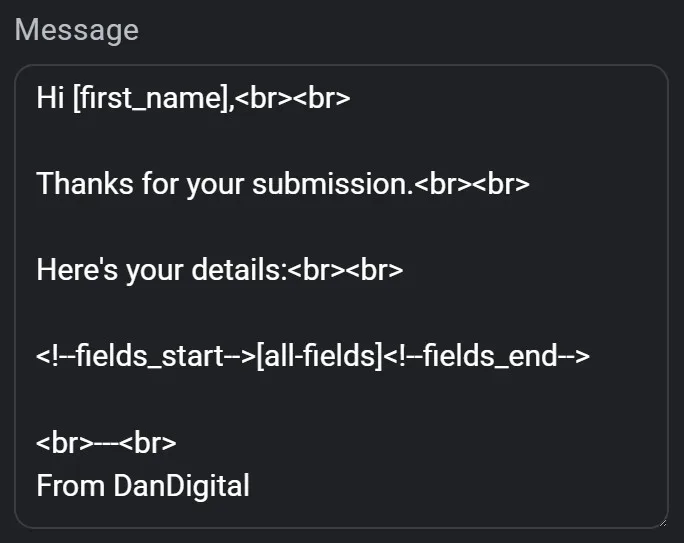
🟢 TIP: In the atomic form message, press ‘@’ to bring up the individual fields you can reference.
🔴 NOTE: Requires Elementor Pro 4.1+ to reference individual fields in the Atomic form.
Step 3: Add the PHP snippet to your site
Add the PHP snippet to your site using your chosen method. If you’re using a child theme and are comfortable editing the functions.php file, add the snippet there.
If you’re using a code snippet plugin such as FluentSnippets or Code Snippets, create a new PHP snippet and paste the code in. Set the snippet to run in the admin area only, this ensures it fires at the right time without loading unnecessarily on the frontend.
🔴 NOTE: Check whether your snippet plugin already adds ‘<?php‘ at the top of new snippets. If it does, remove it from the pasted code before saving.
<?php
function remove_empty_fields_all_fields( $email_text ) {
  $filter = function( $fields_text ) {
    $segments = explode( '<br>', $fields_text );
    $segments = array_filter( $segments, function( $segment ) {
      $plain = trim( strip_tags( $segment ) );
      $last_colon = strrpos( $plain, ':' );
      if ( $last_colon !== false ) {
        $value = trim( substr( $plain, $last_colon + 1 ) );
        return $value !== '';
      }
      return true;
    });
    return implode( '<br>', $segments );
  };

  // If markers are present, only filter between them
  if ( strpos( $email_text, '<!--fields_start-->' ) !== false ) {
    return preg_replace_callback(
      '/<!--fields_start-->(.*?)<!--fields_end-->/s',
      function( $matches ) use ( $filter ) {
        return $filter( $matches[1] );
      },
      $email_text
    );
  }

  // Otherwise filter the entire email
  return $filter( $email_text );
}
add_filter( 'elementor_pro/forms/wp_mail_message', 'remove_empty_fields_all_fields' );
add_filter( 'elementor_pro/atomic_forms/email_message', 'remove_empty_fields_all_fields' );
Step 4: Save, enable and test
Save the snippet and toggle it on. Make sure the page containing your form is published and refreshed, then submit a test form leaving some fields blank. Check your notification email to confirm that only the fields with values appear.